Center view on model before export
If you're going to export the model as a Marmoset View scene to be viewed online, make sure you center the camera on the model first. You can do this by selecting the mesh and pressing Ctrl + F. Doing this ensures that the camera will orbit nicely around the model instead of wandering off randomly.
Check Linear/sRGB color space
In your PBR scenes, specific textures need to be loaded either in Linear or sRGB color space. As a general rule, textures that represent a math operation, such as normal or roughness maps will need to be loaded in Linear space, while textures with color information such as base color/albedo or specular maps will need to be loaded in sRGB/Gamma space.
Some game engines handle this automatically, but others like UE4 for instance give you the power of choice and may need some maps to be manually edited, as unknown textures default to sRGB. There's an sRGB toggle for this in the texture window.
Toolbag usually handles this for you, but it's also been known to mess up every know and then. Here are a couple of tips to spot color space issues in your textures:
- If your model color looks a bit washed out make sure your Albedo is set to sRGB.
- If your model surface looks rougher than it should, make sure your Gloss map is in linear space (if you're using a Roughness map it may look too glossy instead).

sRGB/gamma space simply means that a gamma correction of .45 is applied to the texture, darkening it a bit. The reason for this has to do with how monitors work, and is an interesting read but others have explained it better than I would, so I'll leave a couple of references here.
Blinn-Phong is dead, long live GGX
If you're making PBR materials you definitely want to use GGX as your reflection term, so make sure it is enabled in your Toolbag materials. GGX has been the default for quite some time so chances are you won't have a problem with this, but it's still worth mentioning.
GGX has become the standard, since it provides better image quality and is used by some of the giants in the industry such as Unreal Engine 4, as well as tools like Substance Painter. Just remember, if your textures are authored for GGX but you forget to enable it in Toolbag (or any other renderer) your materials will look glossier than they should.
Single-Sided Vs Two-Sided AO Baking
If you use Toolbag 3 regularly you probably have tried its baker. It is a very fast and powerful solution, that I'd like to cover in more detail in another post.
That said, here's one quick tip...
At the bottom of the baker roll-up you can find the Ambient Occlusion settings, and one of them is called Two-Sided. Enabling this can be very useful when you have colliding meshes in your low-poly that aren't movable parts, because it will make the overlapped areas dark instead of bright. This will avoid those nasty white edges in your AO bakes.
If you take a look at the following Sketchfab scene, you can see that on the left there is a thin white line where the two boxes meet (Single-Sided AO) where as on the right there's a thin grey line instead (Two-Sided AO). Usually the second option looks best, but it may also depend on your model, workflow and personal preference.
Tweak materials for Marmoset View
Sometimes when you export your scene you may find that it looks a bit different in the browser than is does inside Toolbag. The browser renderer doesn't support all of Toolbag 3 features, such as area lights and many post-process effects. This can result in slightly different shading, and sometimes your metals might look a bit glossier than intended.
I struggled with this for a while until I had the simple but effective idea of reducing the gloss value of the material a bit before exporting. Something between .85 and .90 usually works for me. Of course, this will probably only help under certain conditions, depending on your material and lighting setup, and requires you to be using a Gloss map — if you're using Roughness, reducing the value will make the material even more glossy.
Exporting your Scene Bundle
You probably have noticed that when you move your projects files to another location in your hard drive Toolbag will sometimes loose track of your materials or even model file references. Models are saved in your scene file and a reference is kept only to update the scene if the original model file is changed, but textures are not included in the Toolbag file at all. When Toolbag doesn't find them the materials will be missing and you'll have to re-assign them.
This happens because depending on your directory structure Toolbag will use relative or absolute paths to keep track of your assets, and when an absolute path is used and the files are moved at a later time, everything breaks.
If you want to avoid these errors as much as possible, try to keep your assets (models and textures) in a folder below your Toolbag scene, this should allow relative paths to be used.
However, if you want to make a public release of your scene or want to share it with others, the easiest way to do it is by using Toolbag's Scene Bundle option in the File menu. This will save your scene in the folder you select, as usual, but it will also create an Assets folder next to it, and it will put all the needed files there. You can then zip the whole thing and share it with the world.
Shadow catchers & zero-intensity lights
In Toolbag 3 there's an object called Shadow Catcher that creates and invisible surface where your objects can cast shadows. One nice thing about shadow catchers is that they receive shadows even from zero-intensity lights, so if you want an extra shadow or a softer shadow on the ground caused by an area light, you can set it up without affecting the lighting of your scene.
Grey & Chrome balls
One easy way to keep tabs with you scene lighting is to add a couple of balls with different materials. Usually you want at least a chrome ball with full specular & glossiness, and a grey ball with a .044/.054 Specular value (common for non-metals), zero glossiness, and .5 albedo. You can also add a darker ball as well with a different glossiness, or with your preferred material values. Then you can move these balls inside your camera object so that they stay always in the frame.

Actual grey and chrome balls are usually used in photography and VFX to replicate the lighting of an specific scene, but considering Toolbag is primarily an image-based lighting renderer, these balls can give you a constant snapshot of the lighting in your scene, and once you're familiar with their response to light, they will make it easier for you to light your scenes more effectively.
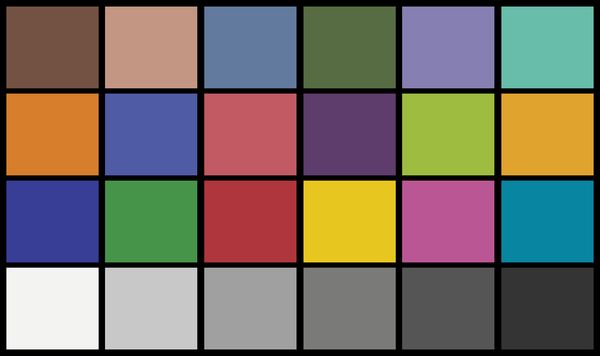
If you want to take things one step further you can also add a color checker table inside the scene. These are usually used in photography to check and calibrate colors and can be a powerful tool in Toolbag too, especially if you plan on adding a strong post processing to your renders.
Know your shortcuts
There's no available documentation at this time regarding Toolbag 3 keyboard shortcuts, but you can find a lot of them by taking a look at the application's menus.
Here are some of the most useful:
Ctrl+I: Import ModelCtrl+D: Duplicate SelectionCtrl+F: Center Camera on SelectionCtrl+U: Show/Hide Guides (light icons, baking cages, etc.)Ctrl+H: Show/Hide SelectionCtrl+R: Toggle between Move and Scale toolsCtrl+Return: Toggle Full ScreenSpace Bar: Show/Hide InterfaceF10: Render Scene and open imageF11: Render Scene